Next Release
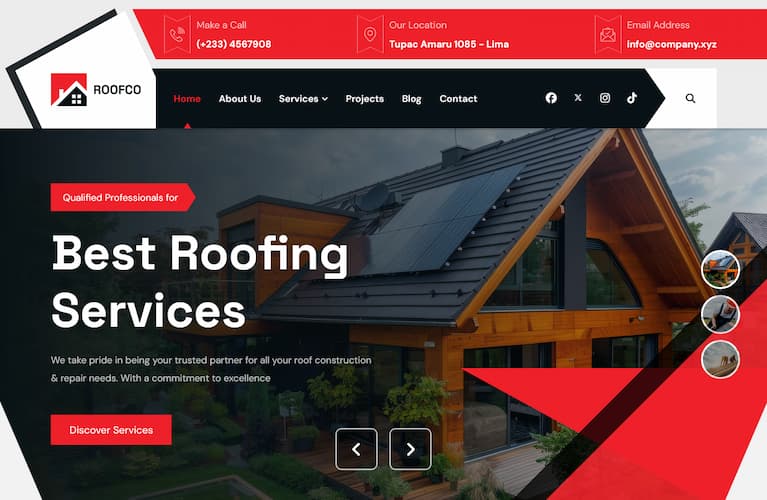
Roofco Joomla Template
Template dedicated to Roofing and construction, with 4 prebuilt websites for Joomla 5 and 6. Subscribe or renew now and be the first to get it when we launch it.


Template dedicated to Roofing and construction, with 4 prebuilt websites for Joomla 5 and 6. Subscribe or renew now and be the first to get it when we launch it.
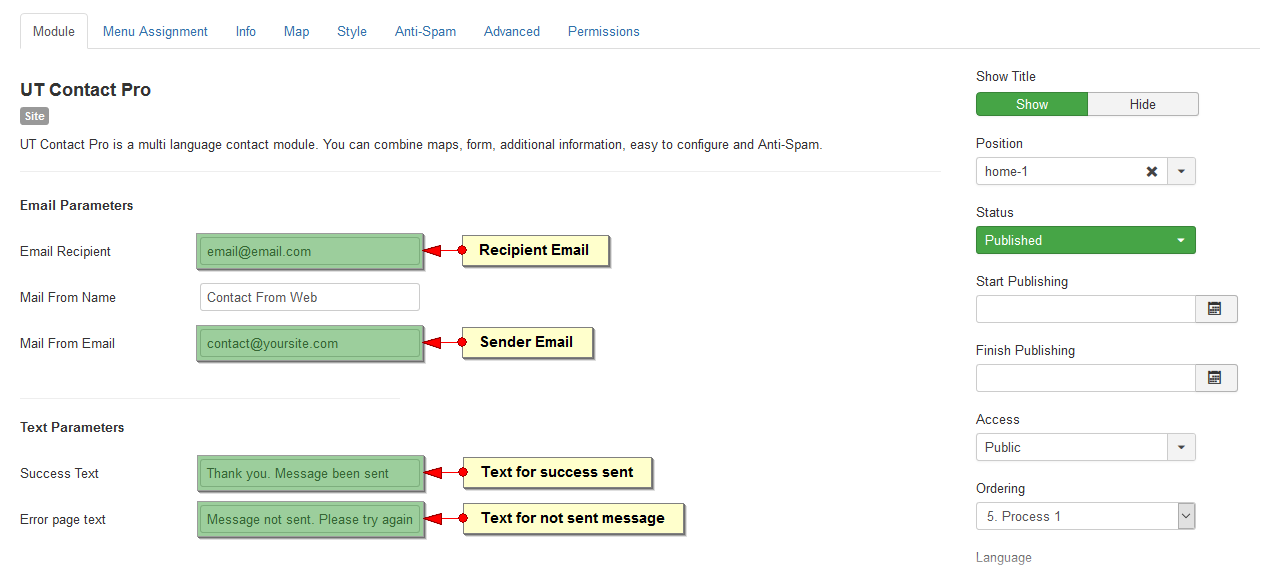
With the module UT Contact PRO addition to adding a form, you can also add maps and extra information. Best of all is that it brings 15 styles (combinations) and anti spam system. You can send emails from anywhere in a Joomla template. You can combine form + information, information + map, map + form, in positions up, down, left and right.
In this section we will detail the function of each of the fields and tabs of this module.
UT Contact Pro is a native module of Joomla !, developed with subForm field type, so the minimum version of Joomla supported is Joomla 3.6.x. As for software, database, web servers and browsers are the same as for any Joomla.
In this tab are the fields related to the form.
Mails: You can receive your emails in your personal accounts from Gmail, Outlook or other. Note that the sender's address can NOT be from Gmail, Outlook or any other of this type.
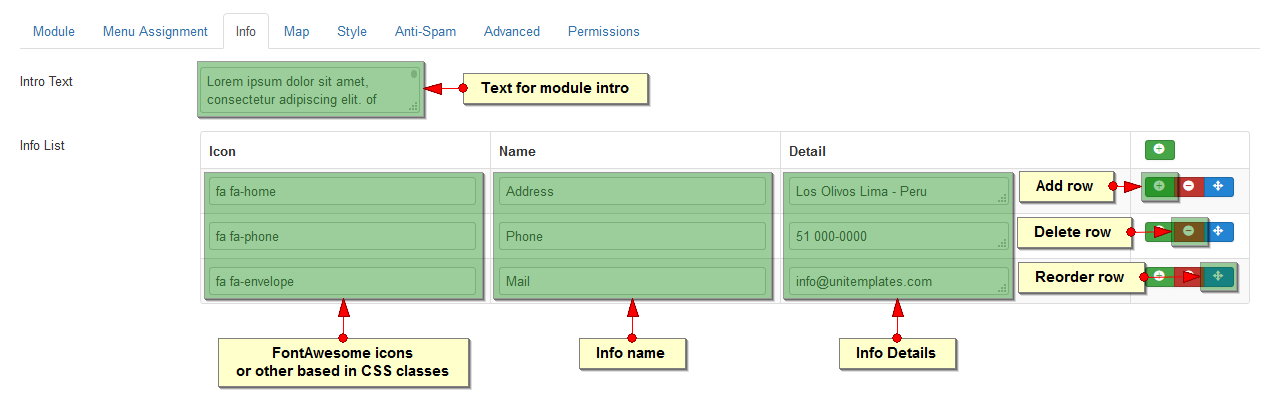
In this tab you can add an introductory text for your module. Also add additional information like address, hours of attention, telephone, etc.
The fields work individually, you can use icon + detail, name + detail, or just detail. For the icons you can enter any CSS class of icon fonts based on CSS classes like FontAwesome, Simple Line Icons, others.
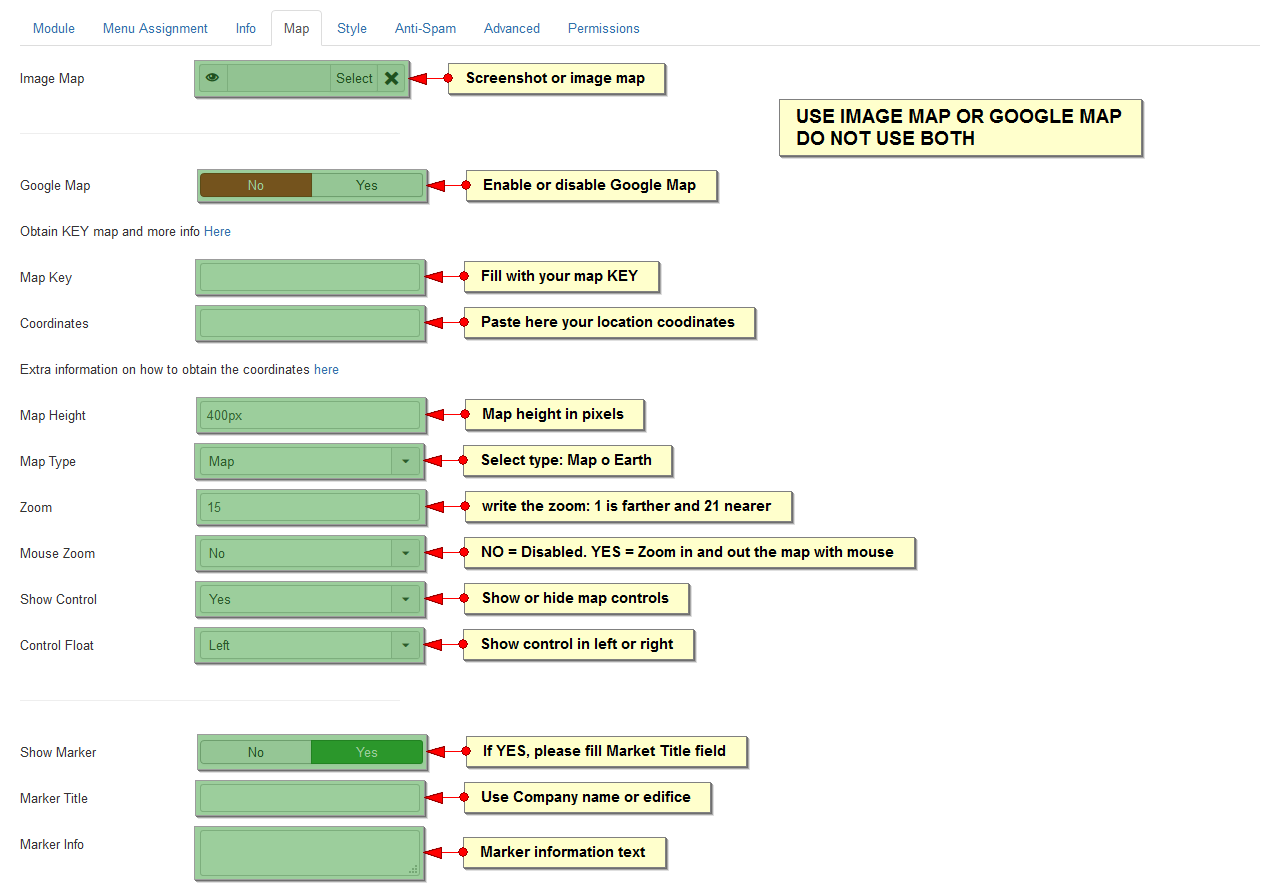
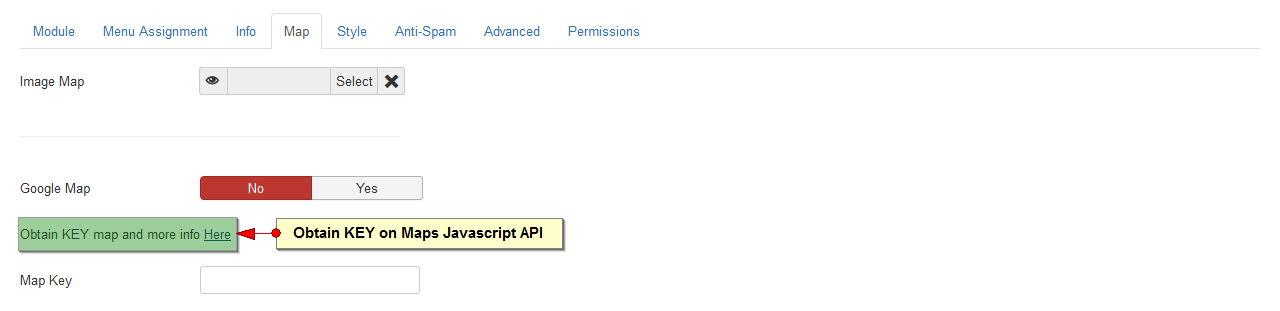
You have 2 possibilities, use an image map or google map.
1. Image Map. The image can be predesigned, a screenshot, or another.
2. Google Map Get a map from Google using coordinates and API key, with controls and a marker.
From this tab you can choose one of the 15 styles (or your modifications from the template), backgrounds, widths and classes.

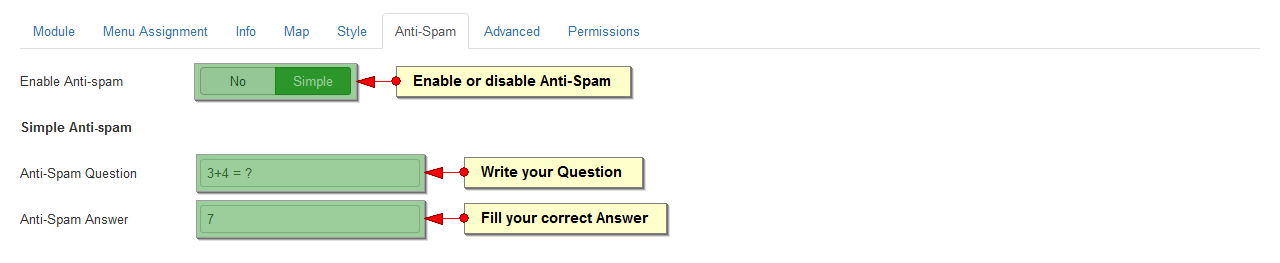
This is a simple but effective Anti Spam control.
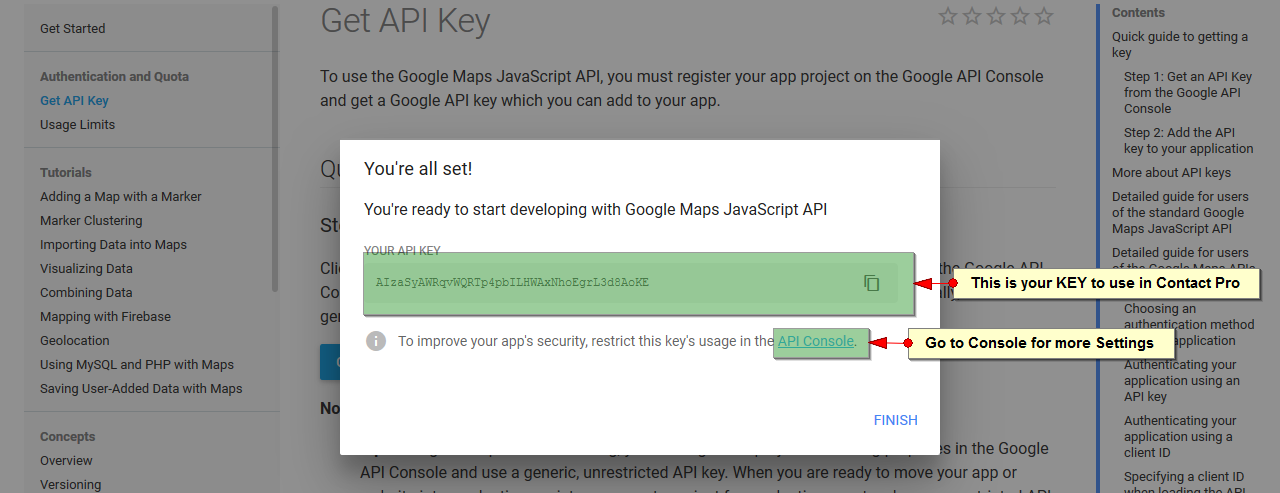
To use Google maps you need a KEY. So the google company arranged it.
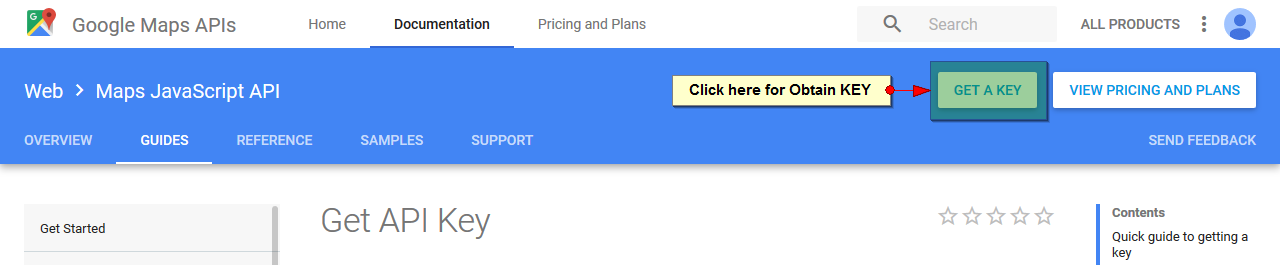
To obtain a KEY you must follow the link that is in the module and follow the steps described below.
Follow the steps below to obtain a KEY.
Follow the steps detailed in the image for Enable Google Maps Javascript API, Create Project.
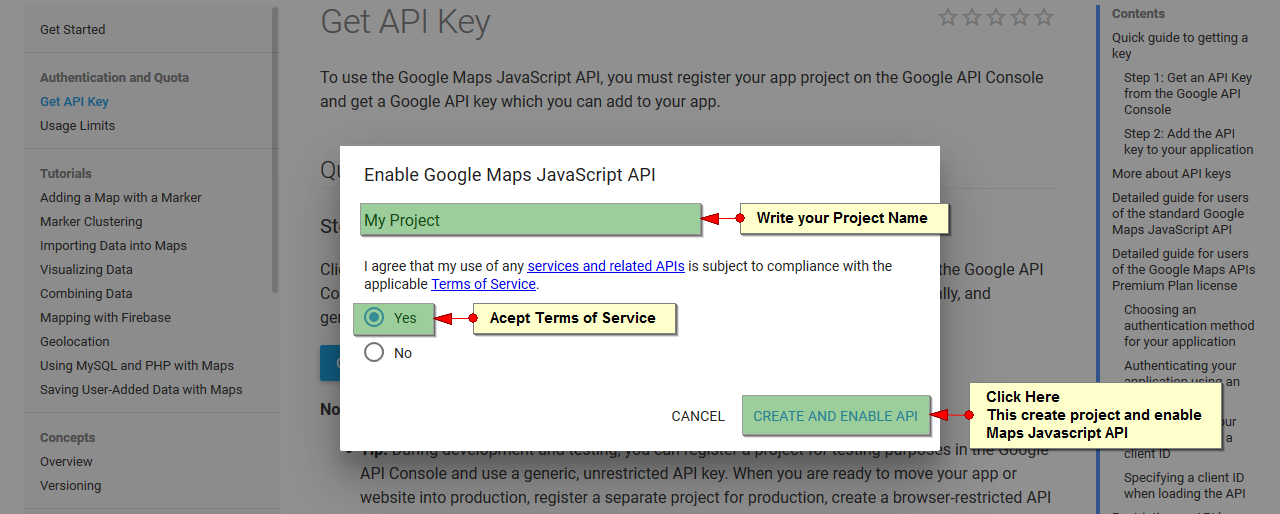
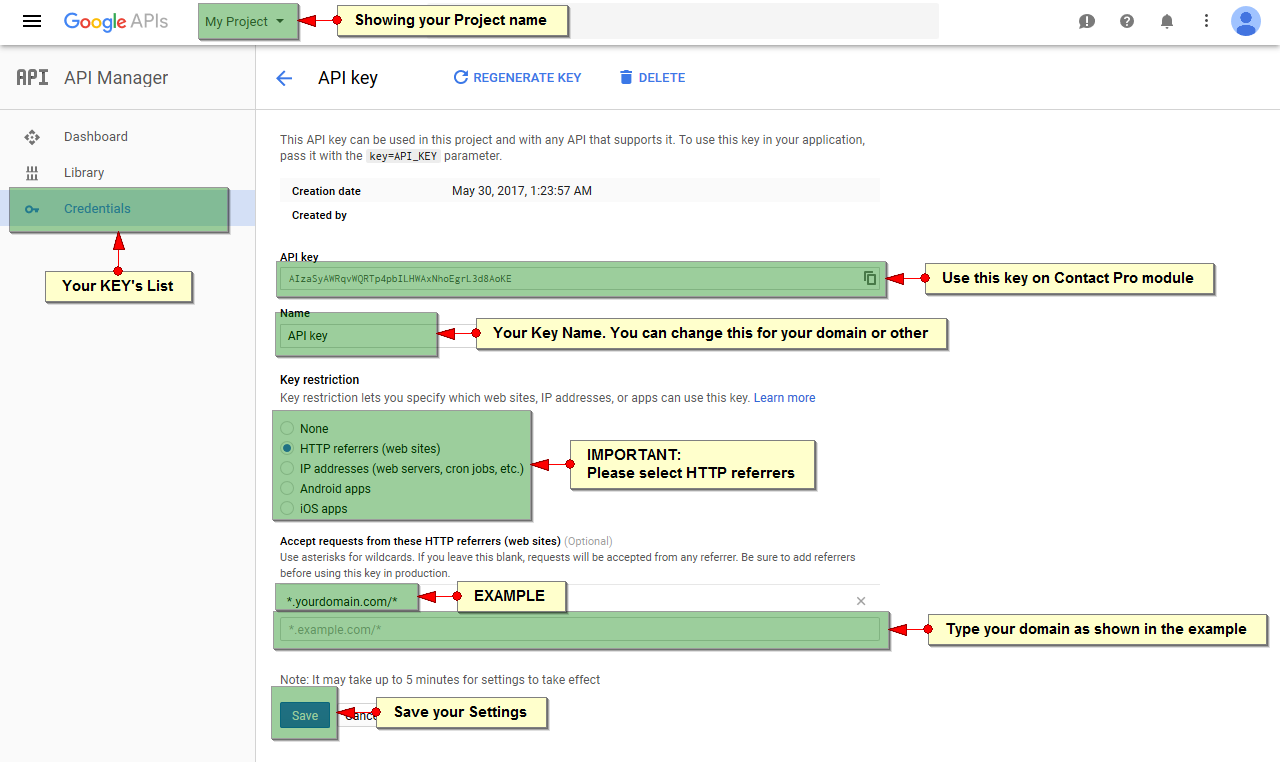
After creating your project and enabling the API, the system creates your KEY
To configure your KEY, you have to go to the Console API. In the following image we show the configuration options of your KEY
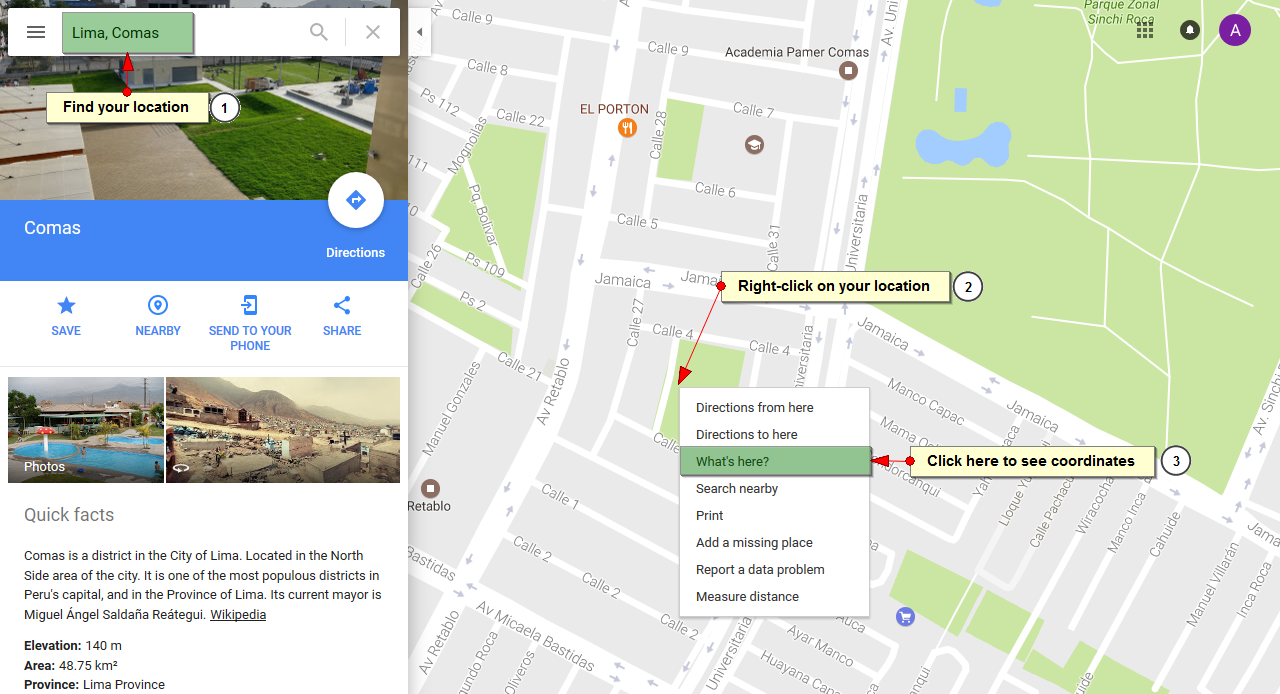
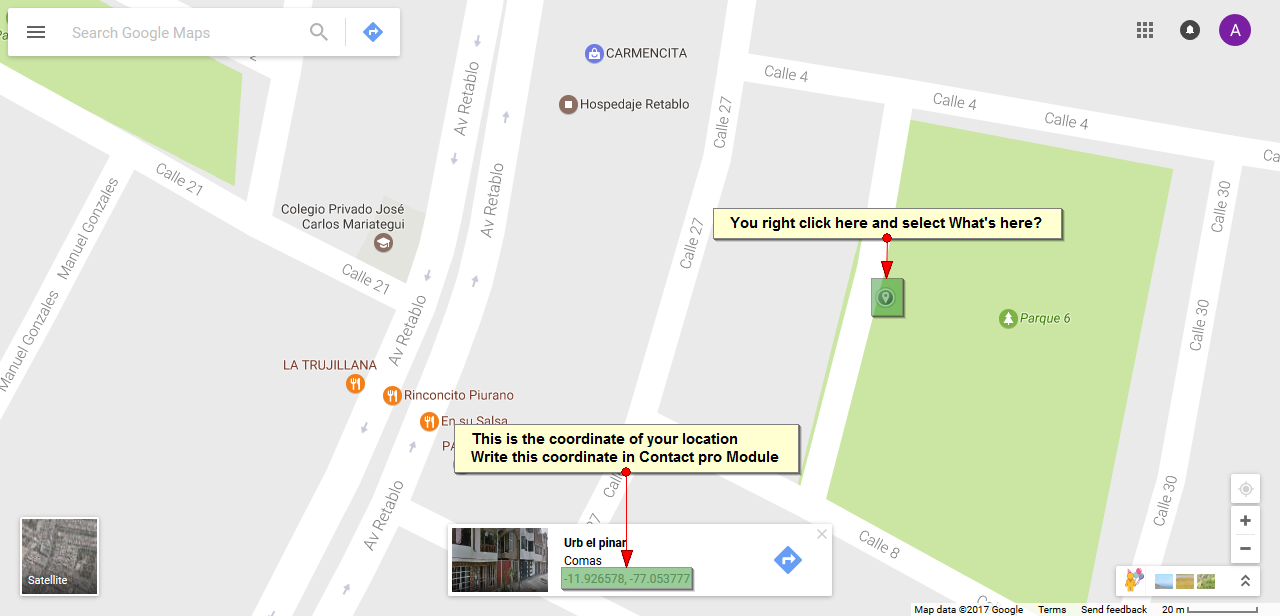
To get the coordinates of a location in Google Maps follow the link of the module and the following steps.
If you follow the link we have left in the module, you can read the google instructions to get a coordinate correctly. We show those instructions below
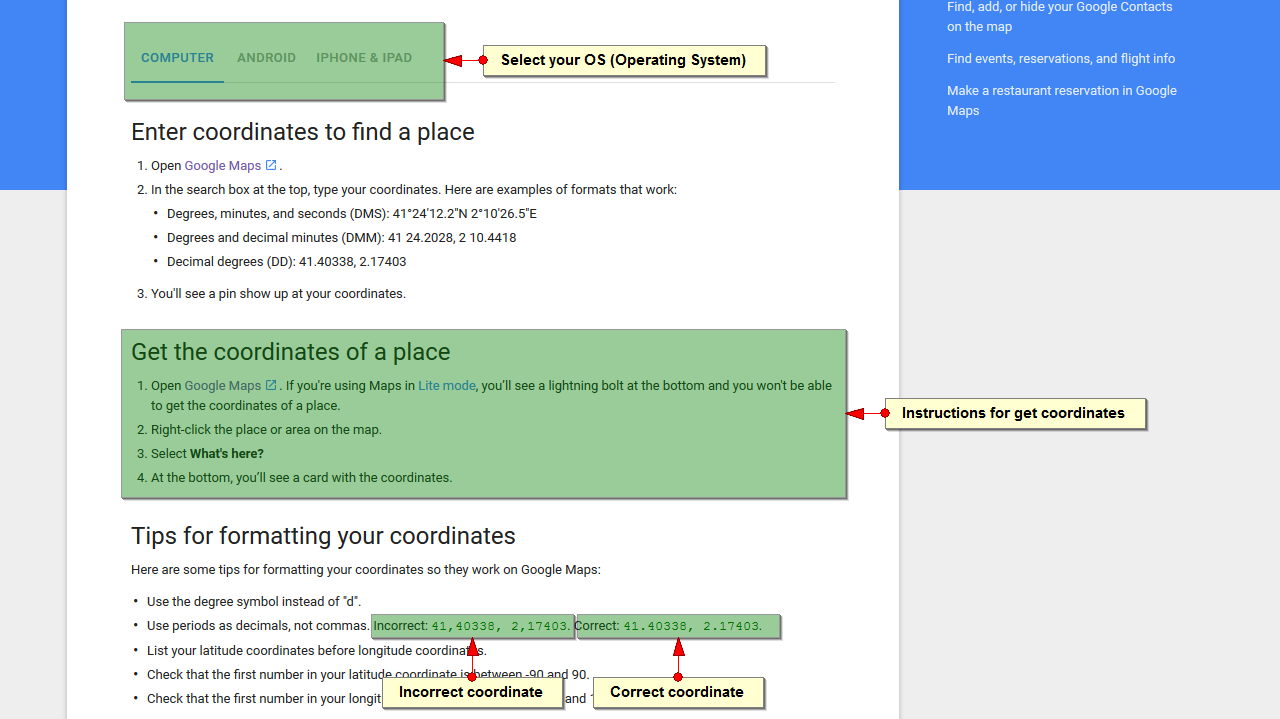
In the following image we see how to obtain a correct coordinate, following the instructions of Google.
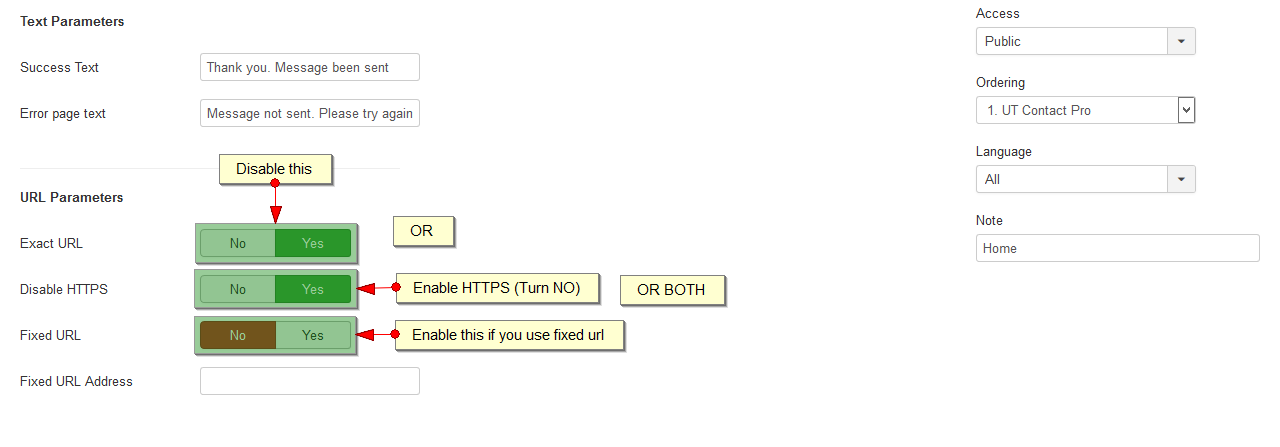
If you have a site that has enabled SSL certificates (HTTPS), we recommend that you disable Exact URL (default is enabled) or enable HTTPS (default is disabled).
In the URL Parameters configuration there is the option to use a fixed url, which can be used if you have other url problems that affect the correct sending of Contact Emails.
Use your cards with Paypal.