SP Page Builder 5 is a powerful and user-friendly drag-and-drop page builder for Joomla websites. With a vast library of add-ons, such as sliders, galleries, maps, forms, and social media integrations, which can be easily customized to fit the website's branding and design.
SP Page Builder 5 also features real-time frontend editing, which allows users to see how their web pages will look as they build them. The responsive design feature ensures that the web pages will look great on all devices, including desktops, tablets, and smartphones.
Overall, SP Page Builder 5 is an excellent tool for Joomla users who want to create visually stunning and responsive web pages quickly and easily, without the need for technical knowledge or coding skills.
How To Use?
The following is not the official documentation, this is a guide so that you know each part of the editor and know how it works and where the main functions are, so that you can learn to use the live editor of SP Page Builder easily and quickly.
Installing SP Page Builder
To install SP Page Builder you have to go to: System >> Install >> Extensions, drag the package in the box. The installer will install the component, the module and the plugins in one go.
Creating Page
For create pages go to: Componentes >> SP Page Builder >> Pages.
Page Builder Dashboard
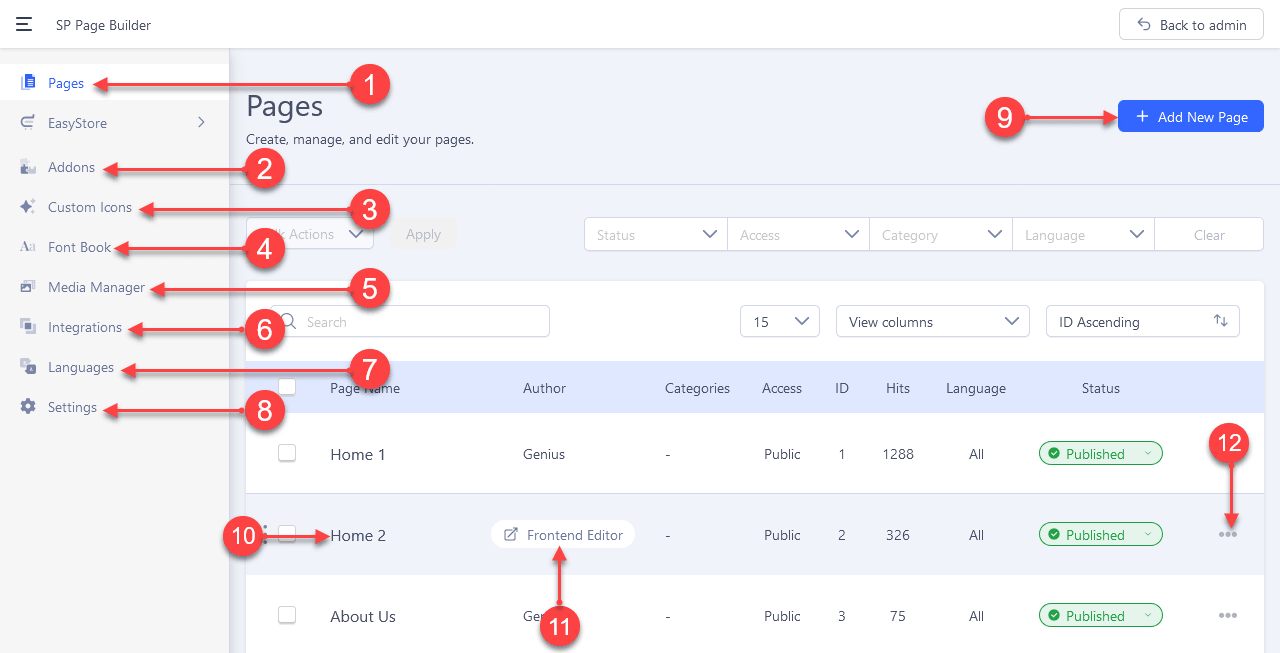
- Manage all created pages
- Enable or disable Addons
- Upload, enable or disable icons
- Configure Google Fonts or Upload your local font
- Magae your images, videos, audio, attachments
- Enable or disable Integrations with other components.
- Install SPPB languages
- Component Options
- Create New Page
- Edit page using Backend Editor
- Edit page using Frontend Editor
- More page options like preview, rename, duplicate, add to menu, export, trash.
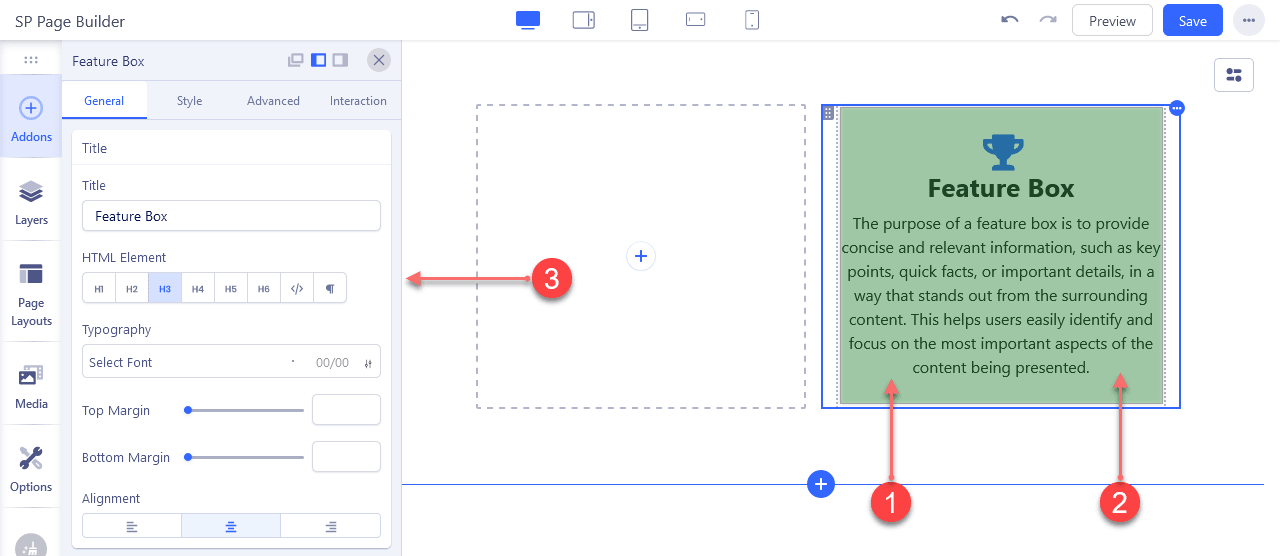
Backend Editor Parts
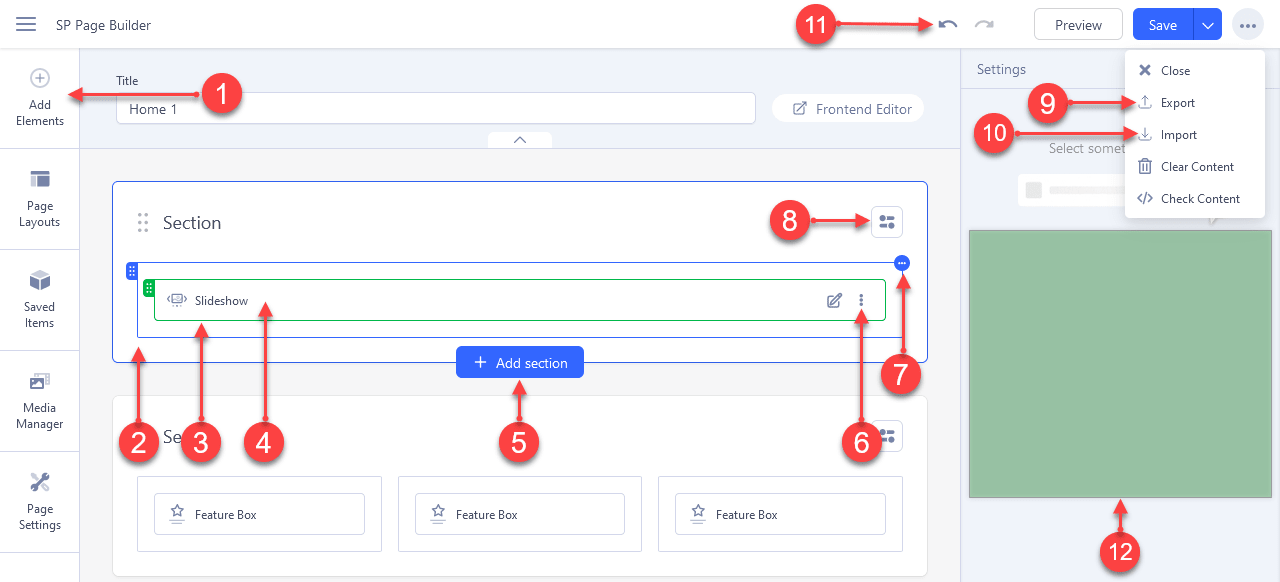
- Available addons list
- Click to open Section settings fields
- Click to open Column settings fields
- Click to open Addon settings fields
- Add new section
- Addon Actions like Copy, Paste, Hide, Duplicate,Save and Remove
- Column Actions like Settings, Hide, Duplicate and Remove
- Secion Actions like Settings, Hide, number of columns, Save, Duplicate, Copy, Paste and Remove
- Export page (generates JSON file that you can import in other page or website)
- Import page (import JSON file exported from other page or website)
- Undo and Redo action (works like Ctrl+Z and Ctrl+Y)
- Area to load setting fields of the section, column or addon, it depends on what you are configuring.
Frontend Editor Parts
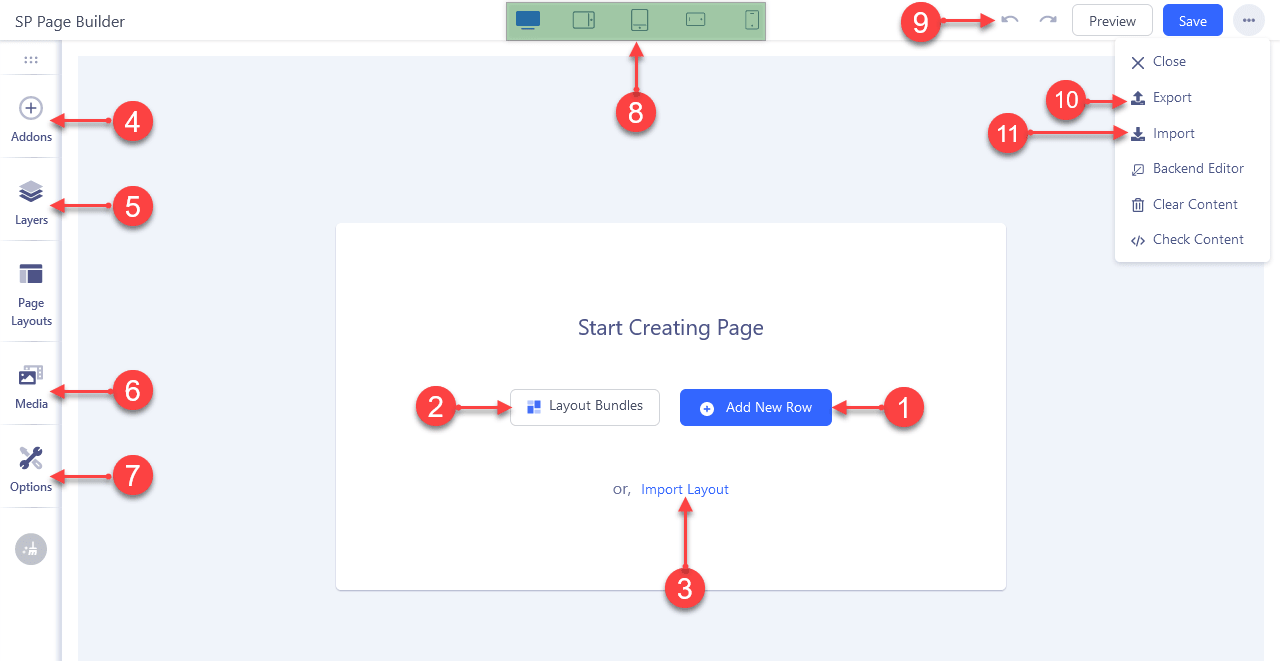
- Add Section with columns from scratch
- Load Page Templates from Joomshaper Library (You need buy a licence)
- Import Page from json file if you have one previously exported
- Available Addons to Drag & Drop
- Layers to manage seccions, columns and addons
- Manage Images, Audios, Videos and Attachments
- Page Options as title, category, status, SEO(Open Graph, metadescription, Keywords)
- Responsive Breakpoints
- Undo and Redo action (works like Ctrl+Z and Ctrl+Y)
- Export page (generates JSON file that you can import in other page or website)
- Import page (import JSON file exported from other page or website)
Using Live Editor
Here's how to work with the Page Builder layout. Remember that the changes are individual for each row, column and addon, later you can clone rows, columns and addons to save time.
SP Page Builder Rows
You can set the rows individually, you can add a title and subtitle to each row. If you need to do complex layouts you can add rows within a column and more columns within the added row.
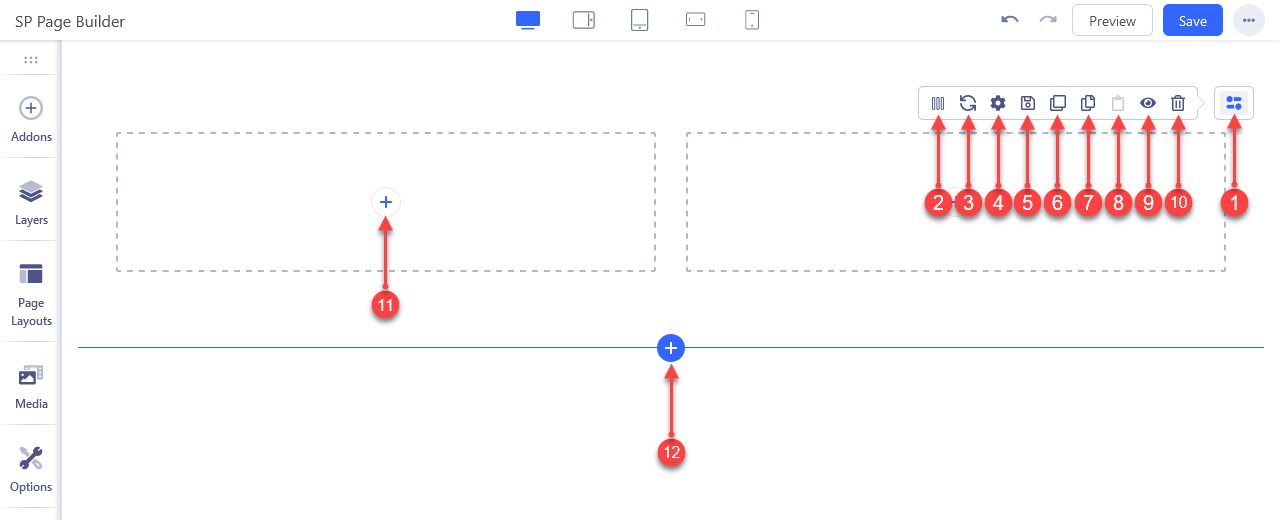
- Toggle row options
- Edit row, add and update predefined or custom number of columns.
- Reset Column Widths (EX: If after add 2 columns of 50% each one, you change width of columns to 60% and 40%, click to return to 50% per column)
- Row Options where you can change design and behavior of this row. (Title, subtitle, padding, margin, background, animations, responsive)
- Save row to import in other pages
- Duplicate row with all addons, columns and settings (clone row)
- Copy row to paste in other page
- Paste row copied from other page
- Enable/Disable row
- Delete row
- Add Addon
- Create new row from scratch
SP Page Builder Columns

- Click for open panel
- Duplicate Column
- Hide/Show Column
- Delete column
- Options, open panel to change Font Color, Backgrounds, Height, Padding, Margin, Border, Alignment, Responsive, animation, etc
- Change column width writing new width, it be different in each beackpoint (device)
- You can change column width Dragging this vertial bar
- Disable on the device where you want to freely change column widths, such as turning a row of 4 columns in 2 rows of 2 columns per row. To see this option you must access the row options (section)
- Drag column to change order
SP Page Builder Addons
The individual configuration of each addon is different and depends on the function of each one. Here are the general options for all addons.
- Click to open eettings panel with fields to configure this addon
- Right Click to open panel of actions like open Settings, Save, Copy, Paste, Duplicate, Hide, Delete and parent Column actions
- Panel with addon fields to configure (the fields are different in each addon)
SP Page Builder Layers
This is a feature introduced in version 4 of SP Page Builder, created to have more control and access to rows, columns, and addons that in complex layouts can be overlapping or other reasons that prevent access from the canvas.
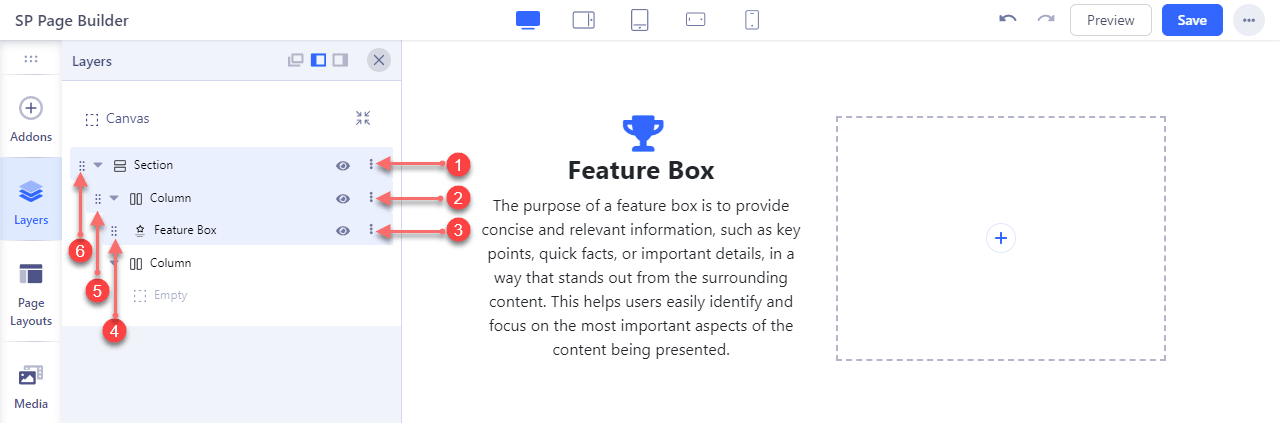
- Open section options
- Open column options
- Open addon options
- Drag addon to reorder
- Drag column to reorder
- Drag section to reorder
Creating Menu
The steps to create a menu item linked to a Page Builder page are the same as the core components of Joomla. Look at the following pictures.
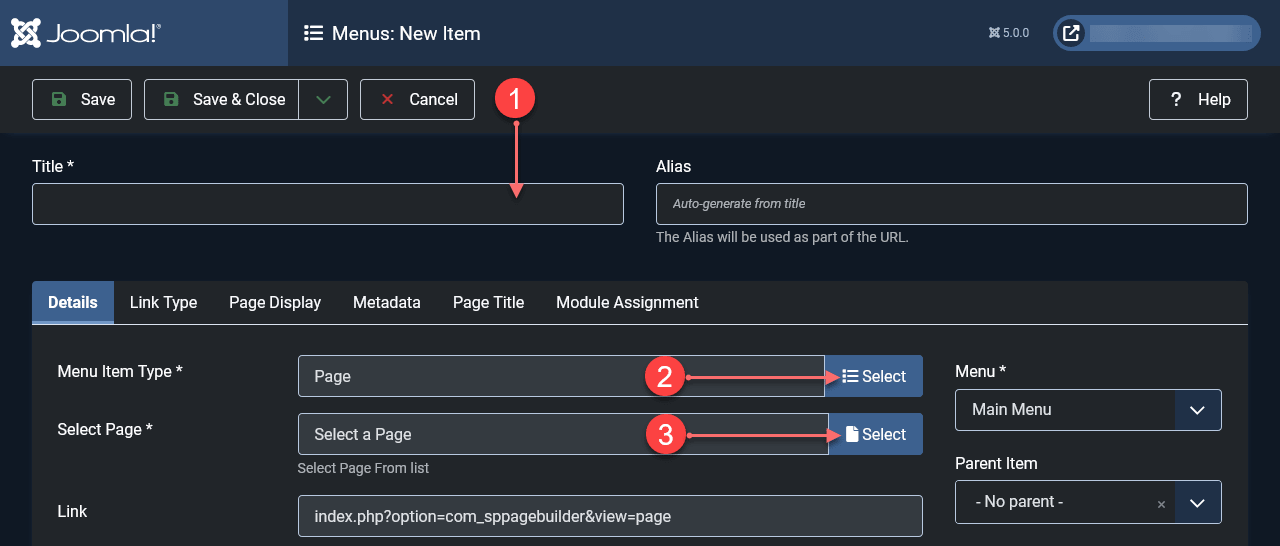
- Your Menu Title
- Select >> SP Page Builder >> Page
- Select a Page Builder page
SP Page Builder Module
The use of the SP Page builder module is equal to the component, and you can use all the features, with the particularity that you can publish the module on any part of your page.
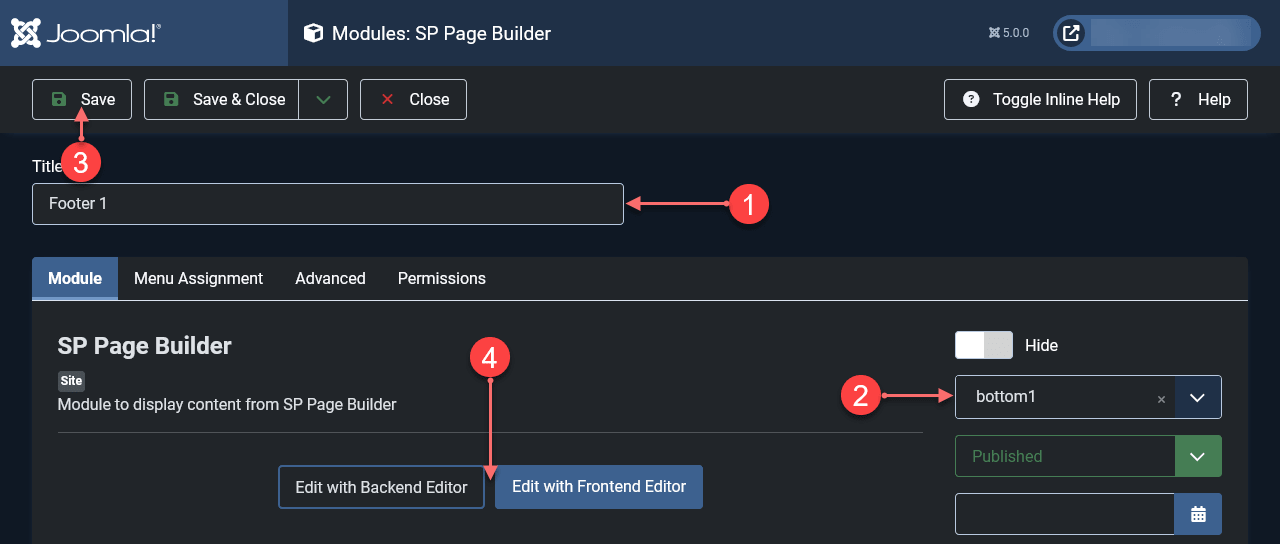
- Add your module title
- Select module position
- Save module
- Open Backend or Live Editor of SP Page Builder (this button is available after save module)
Icons for SP Page Builder
SP Page Builder 5 gives us the ability to manage (add or remove) icons easily from a graphical interface.
At Unitemplates we create icon packs that must be installed only in the templates with which it is attached, the icon pack is found inside of icons folder or among the packs you download, and is called TEMPLATE_NAME_ICONPROVIDER_vx.x.zip (EX: UT_Reto_Flaticon_v1.0.zip). To install go to:
Components >> Sp Page Builder >> Custom Icons >> Upload Your Icon
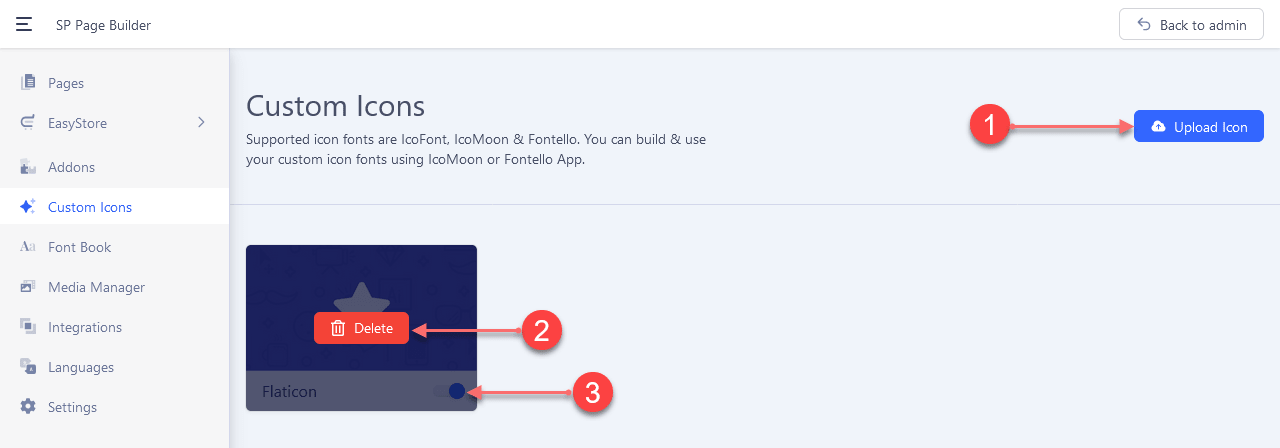
- Add/Uplaod your icons
- Delete icon package
- Enable/Disable icons, when disabled the icons will not be possible to select from the editor
Do not install the icon pack in other templates because it could replace your existing icons with the ones from this pack.